Share
Pin
Tweet
Send
Share
Send
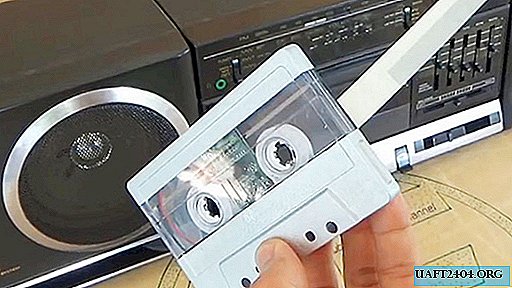
Good day to all! Today I want to share with you the idea of how to use the tape deck of a radio or music center. Few people in the house did not have such equipment, which is a useless load due to the fact that the magnetic recording of music on film tapes has sunk into oblivion.
The abundance of various boards, adapters, adapters, and other devices offered on AliExpress prompted me to use the audio path of a cassette recorder to play music files via Bluetooth.
What do we need
- tape cassette;
- Bluetooth audio receiver
- USB battery charge module TP4056;
- lithium battery 150 mAh 3.7 V;
- micro switch;
- magnetic head from an old cassette recorder.
Of the tools you need a soldering iron, a hacksaw with small teeth (for metal), files or a miniature grinder.
Materials:
- Super glue;
- Plexiglass pieces.
Completing of the work
We take out the magnetic head from the unwanted cassette recorder.

Gently release it from the fasteners.

They are connected by contact welding, so we simply break them off with pliers, being careful not to damage the head itself. The head is thoroughly cleaned of dirt and corrosion.

To do this, you can use a solvent, then grinding paste. The result should be a smooth disc on all sides (except the one where the findings are).
We disassemble the cartridge and take out the reel of film from it.


On the part of the cassette where the film is in contact with the magnetic head of the tape recorder, we are preparing a socket for installing our prepared head.

To do this, carefully cut out the excess parts of the cassette and glue the seat with rectangular pieces of plexiglass.


The head socket should allow it to move freely.


The location of the head should be such that when installing our modified cassette in the cassette receiver, the magnetic heads in the tape recorder and in the cassette are firmly in contact with their working surfaces. They will be used to transmit an audio signal.
The basis of the device is a Bluetooth audio receiver, which receives power from a lithium battery.


The battery is charged via the USB connector using the TP4056 module.

We mill the groove and glue the module.


We place both of these boards and the battery inside the cartridge case.

We solder the signal LED to the corresponding terminals of the Bluetooth board. It will signal that the device is on.

Power is supplied to the device through a microswitch, which is mounted in the cassette so that when installing the cassette, the magnetic head presses on its spring element, including an audio receiver.

A piece of soft rubber is placed on the contact terminals of the magnetic head, which softens the impact of the head on the micric and protects the head terminals from shorting.


Three outputs of the magnetic head are connected to the terminals on the Bluetooth board (common, left, right).


When everything is soldered, we press on the head and check the operation of the device before closing.

When the installation of parts is completed, collect the cassette. Before this, we put both coils from the film in place (we remove the film before this).

This is necessary so that the cassette can reliably take its place when installed in a tape recorder.

For aesthetics, you can paint the cassette with ordinary spray paint.


Well, that's all. Before use, charge the battery.

We insert the cartridge into the tape recorder, observe the glow of the signal LED and turn on the tape recorder in playback mode.


Next, we make a connection to Bluetooth from the phone. Turn on our favorite music. We listen and enjoy.

Conclusion
Below are the links to order the necessary components:
Bluetooth board: //aliexpress.com
USB Charging Module: //aliexpress.com
Battery 150 mAh 3.7 V: //aliexpress.com
Microswitch: //aliexpress.com
Share
Pin
Tweet
Send
Share
Send