Share
Pin
Tweet
Send
Share
Send
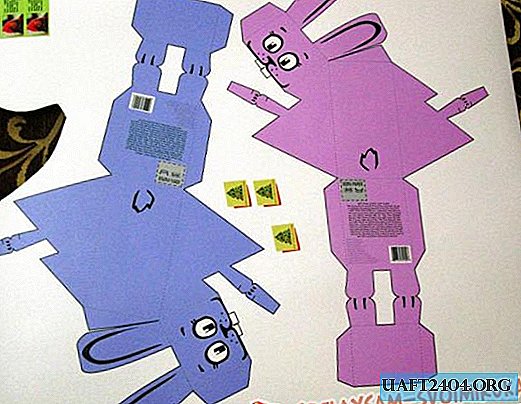
For example, you can make earrings made of polymer clay (plastic). One of the most simple and beloved needlewomen techniques is the "translation of the picture."
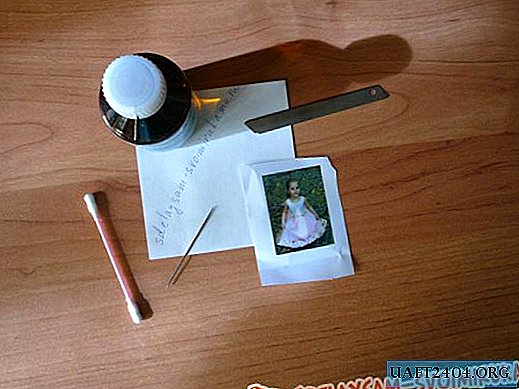
For the manufacture of earrings, trinkets, pendants or any other little things made of polymer clay, we need: white plastic (I used the domestic one - “Sonnet”), a blade from a stationery knife, a needle, ant alcohol, an image printout (required on a laser printer), cotton buds and a work surface (for example, smooth tile), a rounded object for rolling material (I have a glass jar)
Using a clerical knife, we cut off a small piece of plastic and carefully knead it in our hands (so that there are no extra fibers on the piece, and in the future, fingerprints, it is recommended to wear medical gloves).

Now we need to roll out the pancake of the required thickness from plastic. For this, a bank (or any other rounded object) is useful to us.

Carefully crop the printout of the image around the edge (but be sure to leave a small margin).

Now apply the picture to the plastic. It is important that there is no air left under the paper. Therefore, carefully smooth the paper to the plastic with a fingernail.

Using a cotton swab, we apply ant alcohol to the picture.


The picture should practically float in alcohol, but not slip from one place. After the alcohol has dried, repeat the procedure another 1 to 2 times.

Now, gently with your fingers, we begin to roll paper from the image. Movement should be light. Take care not to smear the paint with the paper.


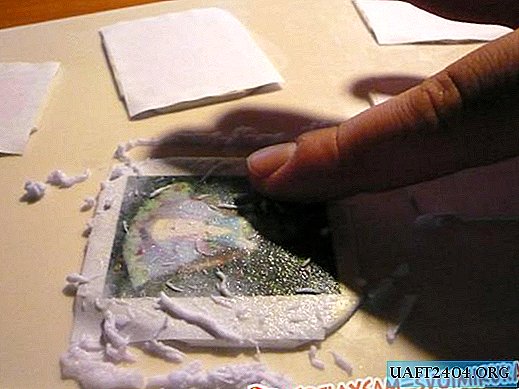


Ultimately, only a picture should remain on the plastic. However, if you cannot remove all paper fibers without harming the image, you can leave them. In the future, they will disappear due to varnishing.

Using the blade from the cutter, we cut off the excess edges (again, leaving a margin of about 1 mm).


We make holes for future trinkets or earrings and set the plastic to bake along with the working surface (i.e., tiles). Bake in accordance with the instructions. Then our “cookies” need to be varnished (varnish is suitable, for example, for wood). We insert the fittings. We are happy with the result!)

Share
Pin
Tweet
Send
Share
Send