Share
Pin
Tweet
Send
Share
Send
Will need
Along with the grinder, we will prepare the following materials and details:
- drill chuck;
- metal rods;
- springs and bushings persistent;
- plexiglass;
- a strip of metal;
- emphasis handle made of plastic;
- screws, bolts, wing nuts;
- glue and rags.
To work on homemade work you can not do without the following tools and devices: vernier caliper, square and tape measure; turning and drilling machines; welding; drank metal and wood; taps with a knob; sand paper; height adjuster, etc.
The order of manufacture of nodes and assembly of the router
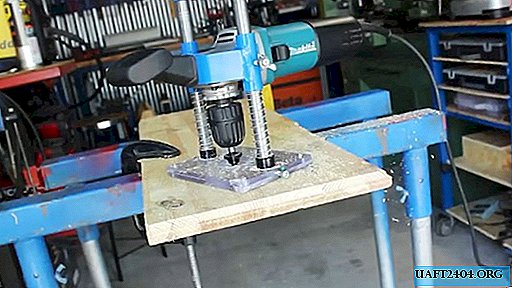
Let's start with the drive - a retrofitted grinder. Other important milling units are the vertical guide rods and the sole. The usual drill chuck cannot be mounted on the angle grinder spindle, because their threads do not match and are equal to M12 and M14, respectively. Using the nozzle, we fix the drill chuck on the lathe and drill a hole for the M14 thread.
Threading can be done not only on the machine, but also manually.

We easily wind the cartridge onto the spindle thread, but we see that it abuts against the centering belt. We drill the entrance to the threaded hole of the cartridge for the diameter and height of the centering belt.

This allows you to firmly fix the cartridge on the spindle thread of the grinder, even by hand, without beating. Our drive of the future milling machine is ready.
We mark out a rod that is suitable in diameter and length for the blanks of vertical rods. We grind it on a lathe to the required size and process it with sandpaper.

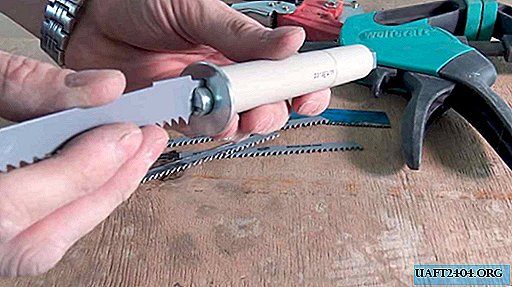
Using a metal saw, we cut the blanks of the vertical guide rods.

From the rod thicker we prepare two segments of the required length and drill into them longitudinal holes for the size of the rods.

We verify the vertical installation of the rods with a square, put springs and guides on them, and simulate their work.

We mark out a sheet of plexiglass and cut out two identical plates with a circular saw on a tree.

We remove the protective film from them, wipe with a rag, put a drop of glue on one of the plates at the corners, and press the other on top. In the double plate, we drill four holes in the corners, we form nests for the screw heads, which we screw flush for the connection strength of the plates.

According to the markings in plexiglass plates in two runs, we drill holes for the rods.

We face the rods on a lathe, drill holes for threads, which we cut manually by a tap.

We install rods in the slots of the plate and fix the metal plate on top.

From a thick strip of metal we cut two identical elements with drilled holes and bend them in a special vice at a certain angle.


We bolt the bent plates on both sides to the grinder body using standard holes for the handle. We install a grinder with a cartridge and a clamped cutter in the center of the sole. At the other end of the angle grinder we substitute the height adjuster and set the grinder in a horizontal position. We weld the bent ends of the plates to the tubes sliding along the rods in the previously designated places.

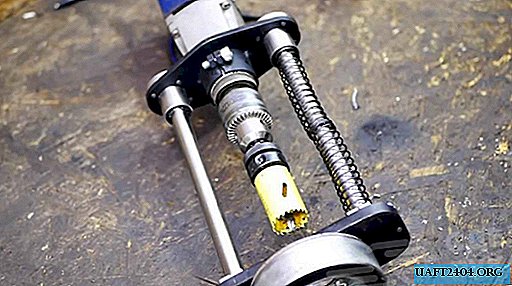
In the center of the platinum sole, we drill a hole with a core drill, designed for the largest diameter of the cutter used.

From a thick strip of metal we bend the bracket and weld horizontally to the front sliding tubes.

Having removed the rods from the slide tubes, we drill holes on the side, cut the threads and screw the bolts with the wing-head.

We remove the sole and from the end to the holes for the rods at a right angle, perform drilling, cut the thread and screw the bolts.


We return the sole back and tighten the bolts, fixing the rods in the holes. We weld an eyelet to the transverse bracket in the center, on which we fix the emphasis handle, consisting of two halves.


We replace the temporary bar that tightens the rods with a bracket, but before we strengthen it, we raise it along the rods and remove the drive with sliding tubes and springs to put the stop bushings. We reassemble the removed components and parts in the reverse order, finally tighten the bracket and fasten the handle.

Having installed the milling cutter in the working position, we fix it by tightening the bolts with the wing heads screwed into the slide tubes and check the operation of the milling cutter in action.


Share
Pin
Tweet
Send
Share
Send