Share
Pin
Tweet
Send
Share
Send
One of the options to add aesthetics and increase functionality is the manufacture of shelves. Firstly, shelves will be covered with ugly pieces of metal, and secondly, in the future they will serve as a place for storing all kinds of shampoos, air fresheners and detergents.
For the manufacture of shelves, which are discussed in this article, the following materials are used:
- Plywood pieces, suitable in size, with a thickness of 10 (mm). You can apply moisture-proof drywall or gypsum fiber sheet.
- Wooden blocks with a size of 50 × 50 (mm). A metal profile of a similar size is also suitable.
- Glass thickness 3 or 4 (mm).
- Trimming tiles that remained when laying the same room.
- Liquid nails, preferably moisture resistant.
- Exterior decorative corners used for tiles.
- Dowels with a diameter of 6 (mm).
- 4.2 × 75 self-tapping screws for attaching the bars to the wall.
- 3.5 × 25 self-tapping screws for mounting plywood sheets to bars.
- Drying oil or wood primer.
- Grout for tile joints.
Tools that will be needed in the work:
- Glass cutter.
- Drill.
- Tile drill.
- Hemisphere in the form of a hemisphere.
- Hammer drill.
- Screwdriver.
- Roulette.
- The square.
- Pliers.
- Building level.
- Jigsaw or hacksaw.
- Tile cutter.
- Rubber spatula.
Manufacturing process
First, two pieces of bars are fixed on both sides of the pipe with dowels and screws. The horizontal plane is controlled by the building level. Care must be taken to ensure that the bars are fixed firmly.
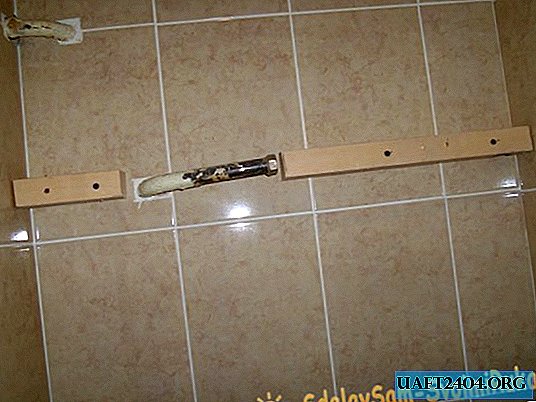
Pieces of plywood are cut to the size of the shelf with a jigsaw. Then they are attracted to the bars with screws. It turns out the design in the form of a box. Then the shelf needs to be covered with drying oil to improve moisture resistance and dried.

It also happens that the pipe protrudes in one of the corners. In this case, the bars are mounted on both sides in a similar way. Above and below, pieces of plywood in the form of triangles are fixed, and from the end - a rectangle sawn to size.


Then tile is laid. It is necessary to cut pieces of tile so that they protrude over the edge of the plywood by about two centimeters. Tiles are easily cut with a glass cutter, but it is better to use a tile cutter if one is available.

To install the bottom row of tiles, holes are drilled in each middle tile. Then, with a cone, grooves are made under the heads of the screws. Subsequently, the screws will need to be covered with grout.

Pieces of tiles are spread with liquid nails and fixed from the bottom with self-tapping screws. The top row fits similarly, but already easier, without self-tapping screws. In order to close the external cut edge of the tile, a decorative corner made of plastic is used. It is also glued with liquid nails. The glue should dry for about twelve hours.

Then mosaic elements are made. Since the thickness of the shelves is 70 (mm), the glass is cut a little smaller in size, i.e. approximately 60 (mm). Any glass is suitable, you can make a mosaic even from scraps.

The tile is cut into small pieces measuring approximately 10 × 10 (mm). Then, liquid nails are applied to the glass and the scraps are glued to it in random order. It is only necessary to alternate the dark and light tones of the tile, to give a certain completeness to the picture.

After the liquid nails completely dry, the sheets of the finished mosaic are glued to the ends of the shelves. In order for the gaps between the tiles and the mosaic to be the same, you can use plastic wedges.


The next day, you can begin to finish. The grout for tile joints is diluted with water to the consistency of sour cream and then the joints are filled with a rubber spatula. After about half an hour, the excess grout is removed with a soft sponge and water.

Share
Pin
Tweet
Send
Share
Send

